DIY Barrel Sauna: Build Your Own for Under $5,000 (2025 Guide)
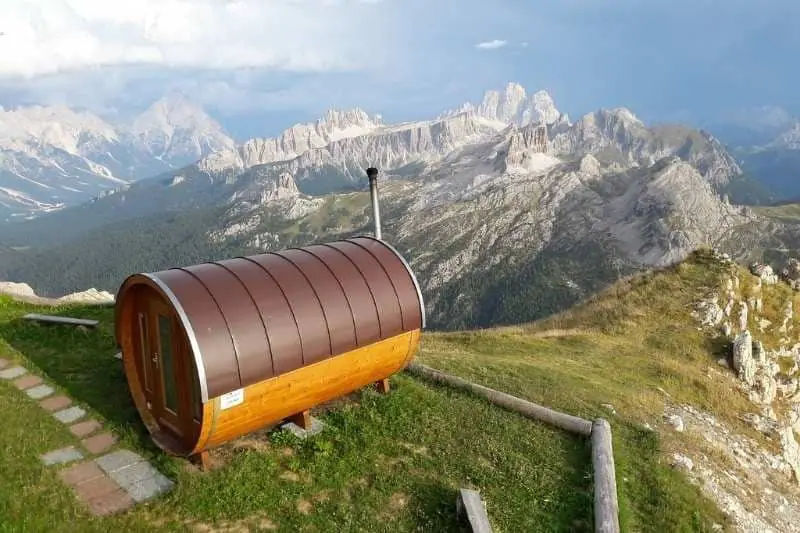
I’ve helped build and maintain dozens of DIY barrel saunas, watching homeowners save over $7,000 compared to pre-built models. While retailers charge $3,000-$10,000, you can build a professional-quality barrel sauna for just $2,500-$5,000 using basic tools and readily available materials.
Key Takeaways
- Build a barrel sauna yourself for $2,500-$5,000 (saving $3,000-$7,000 versus pre-built)
- Complete the project in 2-4 weekends with basic tools
- Choose from 4 sizes: 2-person (6′), 4-person (8′), 6-person (10′), or 8-person (12′)
- Select from electric, wood-burning, or gas heaters ($150-$3,500)
- Follow our step-by-step guide for proper assembly that lasts 15-20 years
The magic of a barrel sauna lies in that round shape. From my years of experience, I’ve seen how the curved walls make heat flow naturally from bottom to top. No cold spots like you get with square saunas. Homeowners love how these barrel saunas fit neatly in small backyards and heat up 30% faster than traditional designs.
My step-by-step guide makes building your own cedar barrel sauna simple. With basic tools and the right wood, you’ll create a Finnish-style sauna that looks stunning and works perfectly.
Let’s start building your outdoor barrel sauna project.
Table of Contents
What is a Barrel Sauna?
When people first see a barrel sauna, they’re instantly drawn to its unique cylindrical shape. Like a giant wooden barrel standing on its end, these saunas combine time-tested Finnish traditions with smart engineering.
The Science Behind the Shape
The round cylindrical design of a barrel sauna creates perfect heat circulation. The curved walls help distribute heat more evenly compared to traditional square saunas, eliminating cold spots and creating a more comfortable experience. This natural flow means your sauna heats up a lot faster than traditional square designs, saving both time and energy.
Core Components
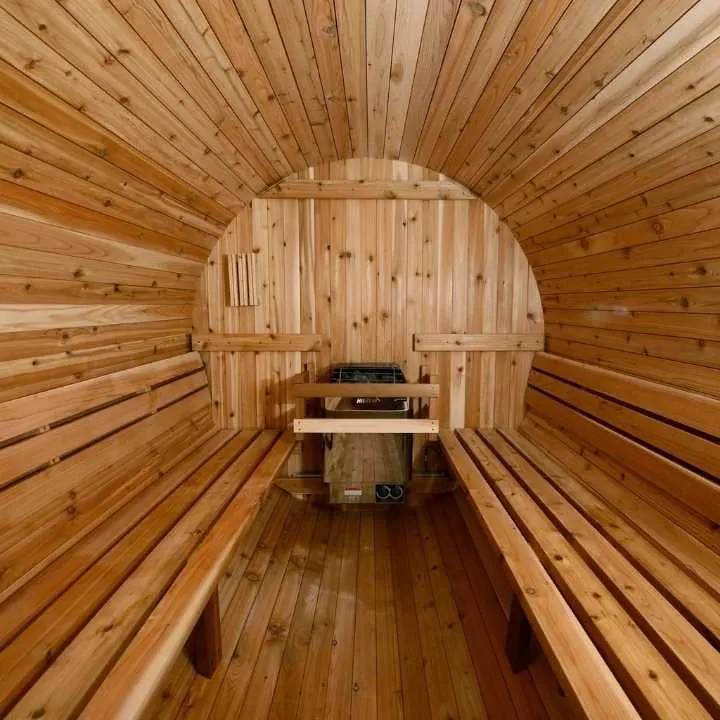
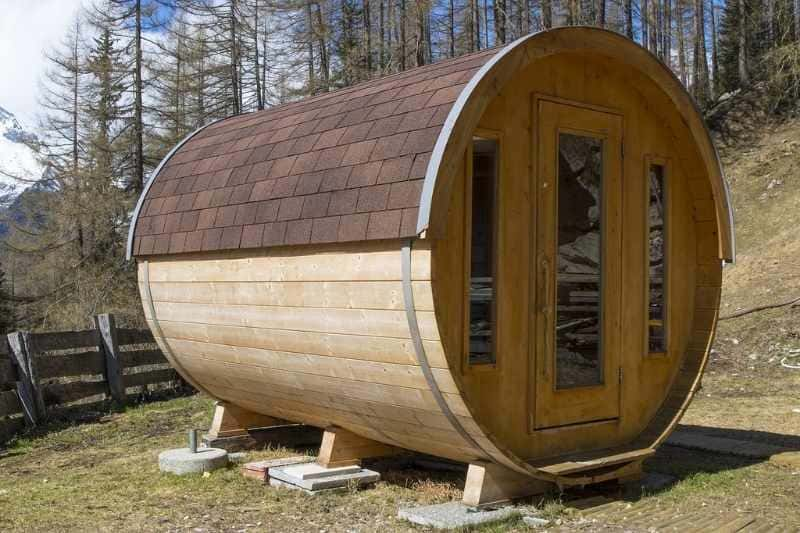
The heart of every barrel sauna lies in its staves – vertical wooden boards that create the barrel shape. I prefer using cedar for barrel saunas because it resists moisture and smells amazing. These staves lock together, held firm by stainless steel bands spaced every few feet.
Inside, you’ll find benches at different heights for varied heat experiences. A proper ventilation system keeps air fresh and moving – typically with intake and exhaust vents. Your choice of sauna heater (electric, wood, or gas) powers the whole experience.
What is the Perfect Size of a Barrel sauna?
Here’s what I recommend based on capacity:
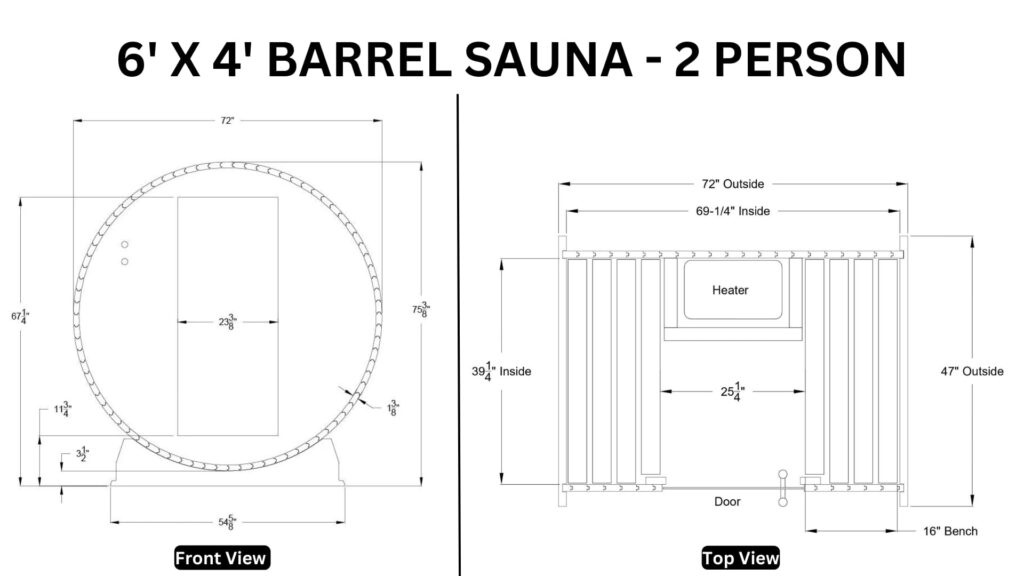
- 2-Person: 6 feet long x 5 feet wide
- 4-Person: 8 feet long x 6 feet wide
- 6-Person: 10 feet long x 7 feet wide
- 8-Person: 12 feet long x 8 feet wide
Not familiar with saunas yet? My foundational guide on saunas will get you started.
Planning Your Barrel Sauna Project
Choosing Your Location
Your sauna’s location makes a huge difference in both construction and enjoyment. Find a spot with level ground and good drainage. You’ll need easy access to power for electric heaters, and I recommend a bit of natural shelter from harsh weather.
Space and Layout Planning
Each person needs about 2 feet of bench space for comfort. The ceiling height should reach at least 6.5 feet – I usually aim for 7 feet to give taller folks some extra headroom. Want a changing room? Add 2-4 extra feet to your length.
Building Requirements
Before starting any sauna build, check local building permits and electrical requirements. International Building Code (IBC) mandates that saunas must comply with general construction safety standards, including structural integrity and accessibility provisions.
Your foundation needs vary by climate:
- Cold Regions: Go with concrete slab or pier foundation
- Mild Climates: A wooden deck or gravel base works well
- All Areas: Ensure proper drainage around the site
Related: Build Your Own Sauna
Timeline and Budget
A barrel sauna project typically takes 2-4 weekends to complete from scratch. If you’re using a pre-cut kit, you can finish in 1-2 days. For materials, budget between $2,500-$5,000, depending on your chosen size and features.
Complete Cost Breakdown
Basic Material Costs
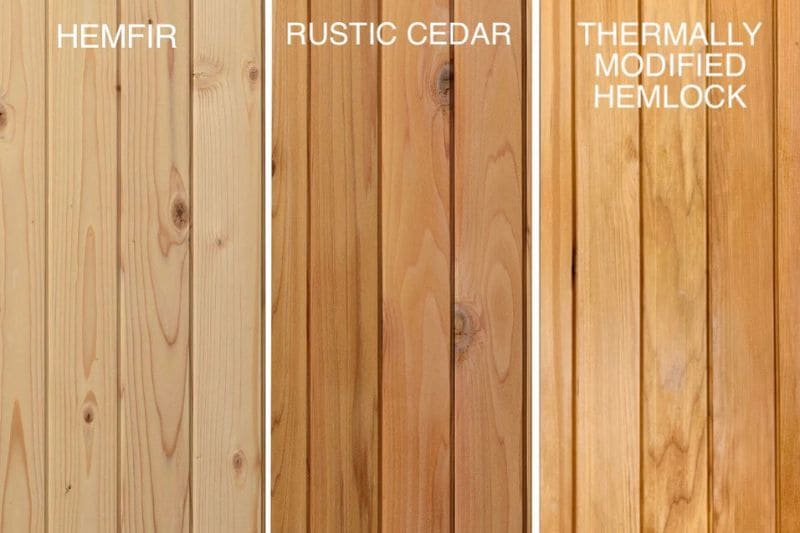
Building your own barrel sauna saves serious money. Material costs can vary widely for budget-friendly and luxury models. Cedar remains my top choice – while it costs $3-$5 per board foot, its natural resistance to moisture makes it worth every penny. Hemlock ($2-$4 per board foot) and pine ($1-$3 per board foot) offer cheaper alternatives.
Not ready to build? Check out my guide to the best barrel saunas for every budget.
Essential Equipment
Your heater choice impacts both cost and experience. Here’s what I’ve found works best:
- Electric Heaters: $150-$3000 from brands like Vevor, Finlandia, and Harvia
- Wood-Burning: $400-$3500 from Timberline, Aleko, Huum, and Harvia
- Gas Options: $800-$2,500 from Rinnai or Bosch
Hardware and Extras
Don’t skimp on quality hardware – it’s crucial for safety and longevity. You’ll need:
- Stainless steel bands (1-inch wide)
- Corrosion-resistant screws
- Heavy-duty outdoor hinges
- Proper ventilation components
Running Costs & Long-term Value
I always tell people that barrel saunas boost property value. While a pre-built model costs $3,000-$10,000, building your own typically runs $2,500-$5,000 total.
Monthly operating costs stay low – just $27-30 for daily use with an electric heater.
Essential Materials and Tools
Now that you understand the costs involved let’s look at exactly what materials and tools you’ll need for your barrel sauna project.
Wood Selection Guide
Your choice of wood makes all the difference. Through years of experience, I’ve learned that western red cedar excels for its durability and natural oils. The wood needs to be exactly 1 inch thick for staves and 1.5 inches for benches.
Core Building Materials
Every barrel sauna needs these basics:
- Premium-grade wood for staves
- Weather-resistant roofing
- High-quality door hardware
- Proper insulation materials
- Foundation components
Required Tools
Most of these tools you’ll likely have, but some are specific to sauna building:
- Circular saw
- Electric drill
- Band tensioning tools
- Level and measuring tape
- Safety equipment (goggles, gloves)
Electrical Components
If you’re installing an electric heater, you’ll need special supplies. I recommend working with a certified electrician for:
- Heat-rated wiring
- GFCI protection
- Control panel installation
- Proper grounding systems
DIY Barrel Sauna: Step-by-Step Building Process
After helping build over 20 barrel saunas, I’ve developed a foolproof process. Proper assembly makes the difference between a sauna that lasts 5 years versus 20 years. Let me walk you through my tested method.
1. Foundation and Site Prep
The foundation makes or breaks your sauna’s longevity. I learned this the hard way when my first build shifted after winter frost. Here’s my rock-solid prep process:
Ground Preparation:
- Clear a space 2 feet larger than your planned sauna size
- Remove all grass, roots, and debris
- Dig down 6 inches for proper drainage
- Level the ground using a laser level
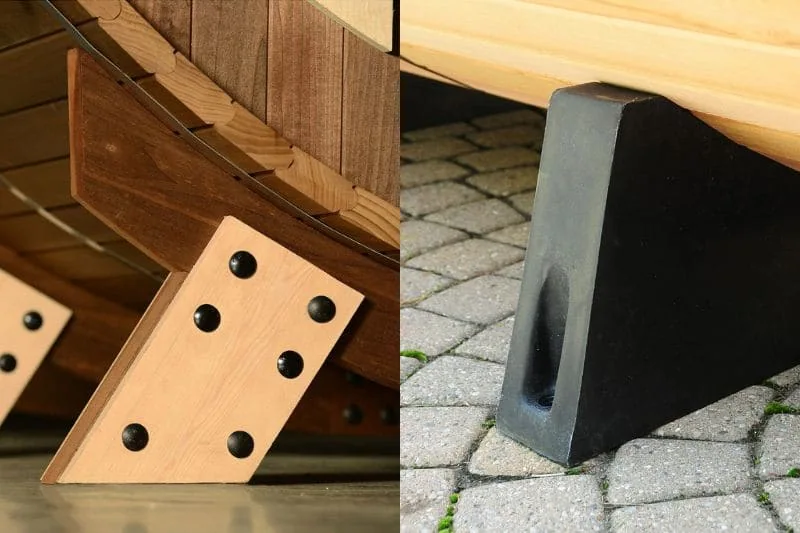
Your foundation choice depends on your climate. Based on barrel sauna foundation requirements, here’s what works best:
For cold climates:
- Pour a concrete slab or install a pier foundation
- Use 2×6 lumber for forms
- Add 4-inch gravel base
- Install vapor barrier
- Pour 4 inches of concrete
- Allow 48 hours minimum curing time
For mild climates:
- Create a gravel base
- Add 4 inches of 3/4-inch minus gravel
- Top with 2 inches of crushed rock
- Compact and level thoroughly
2. Base Frame Assembly
The base frame sets up your entire build for success. Always spend extra time here – it pays off later.
Start with pressure-treated 4x4s as skids. Check diagonal measurements obsessively at this stage – even a 1/4 inch difference can cause problems later. Install floor joists 16 inches apart, add blocking between them, and then attach your pressure-treated plywood flooring.
3. Stave Assembly
This is where your sauna starts taking shape. These details are crucial here:
- Begin with the bottom center stave
- Work outward alternately – this maintains balance
- Use only rubber mallets to protect the wood
- Leave 1/8 inch gaps for wood expansion
🔍 Pro tip: Number all staves during unpacking. Trust me, this simple step saves hours of frustration later.
4. Band Installation and Door Framing
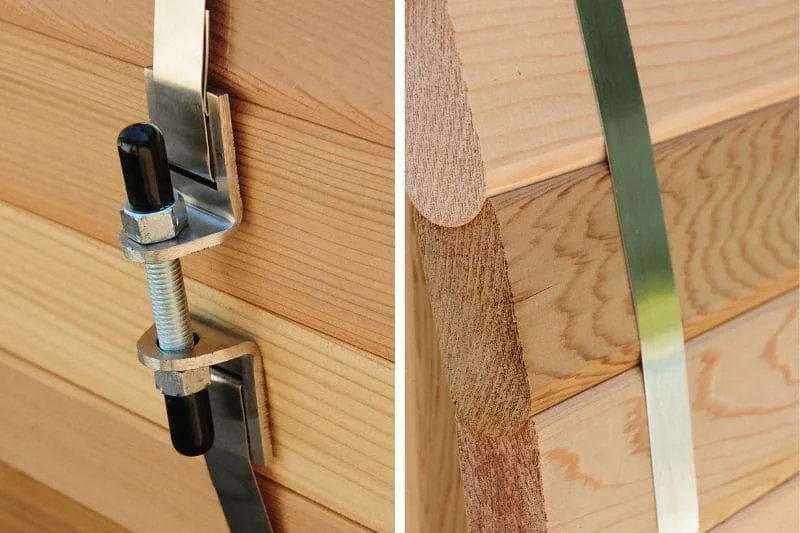
After assembling the staves, place metal bands around the sauna. The bands hold everything together. Use a torque wrench to tighten bands to the manufacturer’s specifications to ensure stability without warping the wood.
For proper band tensioning:
- Space bands every 24 inches
- Start with the middle band
- Work outward to ends
- Keep end bands 6 inches from the edges
- Tension to 30-50 inch-pounds
For door installation:
- Use double staves for frame strength
- Leave a 2-inch bottom gap for air intake
- Install weatherstripping
- Allow 1/2 inch around the sides for operation
5. Ventilation System
Proper ventilation requires:
- Intake vent: 4 inches diameter minimum
- Exhaust vent: 4 inches diameter minimum
- Place intake near the floor by the heater
- Install exhaust high on the opposite wall
- Ensure vents are adjustable
- Test airflow before completion
6. Interior Setup
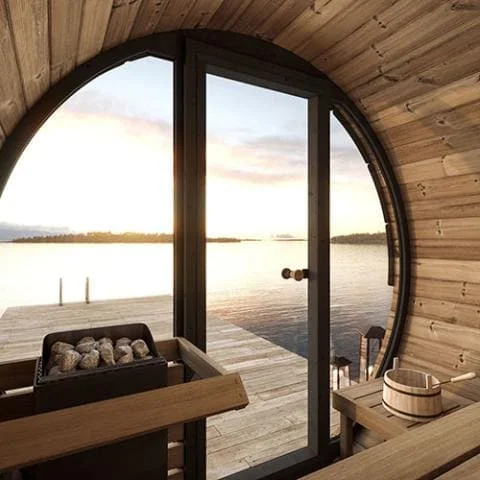
The inside of your sauna needs careful planning. Follow these specifications:
- Maintain a minimum ceiling height of 6.5 feet
- Mount bench supports every 16 inches
- Use 1.5-inch thick wood for benches
- Install benches at different heights
- Leave 1/4 inch gaps between bench boards
- Make benches removable for cleaning
- Install thermometer at seated head height
Also Read: Sauna Bench Design
7. Final Testing
Before first use:
- Check all band tensions
- Verify door and window seals
- Test ventilation system
- Run empty sauna at full heat for 1 hour
- Check for any movement or squeaks
- Verify proper heat distribution
👉 Remember: Take your time with each step. Rushing things costs more in the long run. A properly built barrel sauna becomes a family treasure that lasts generations.
Heater Selection and Installation
The heart of your barrel sauna lies in its heater. Last year, I switched the heater in my personal sauna three times before finding the perfect match. From my years of experience and testing, here’s everything you need to know about sauna heater installation.
Finding Your Perfect Heat Source
Sauna heater experts rank electric, wood, and gas options differently based on use. In my experience, most home builders pick electric heaters – they’re easy to use and super reliable. But some of the most satisfied sauna owners I know went with traditional wood-burning options.
Electric Heaters: The Modern Choice
Electric units deliver steady, reliable heat. My favorite brand, Harvia, offers heaters that reach the perfect sauna temperature in just 30 minutes.
Your installation needs:
- Dedicated circuit
- 6-8kW unit for standard barrels
- Professional wiring setup
- Digital control mounting
The best part? You can program these heaters to warm up before you get home.
Wood-Burning Heaters: The Traditional Path
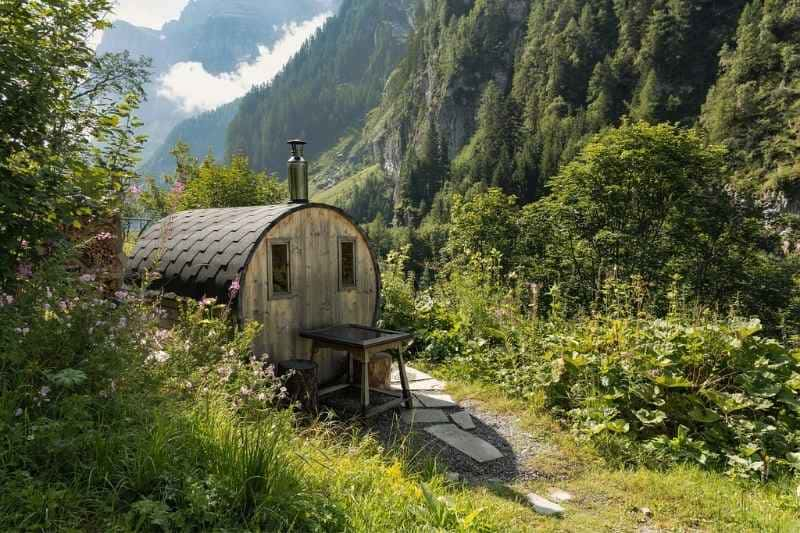
Traditional Finnish saunas use wood stoves. They take longer to heat – usually 40-60 minutes – but create deeper warmth. Plus, nothing beats the scent of burning cedar.
I always ensure these setups include the following:
- Safe chimney installation
- Fresh air intake pipe
- Proper heat shielding
- Fire-resistant flooring
Related: Electric vs Wood Burning Sauna Heater
Gas Heaters: The Efficient Alternative
When I build saunas where natural gas is cheap, these offer great value. They combine electric’s convenience with wood’s deep heat.
Professional installation must cover the following:
- Certified gas line work
- Proper ventilation
- Emergency shutoffs
- Fresh air intake
Critical Safety Standards
Heaters must be installed according to manufacturer specifications and local codes. To ensure that sauna heaters meet safety requirements regarding fire hazards and electrical safety, they must comply with UL safety standards which cover electrical components and heating elements.
After installing over 50 sauna heaters, I’ve learned what matters most. These are my safety guidelines:
- Test all safety features
- Keep 12-inch gaps around heaters
- Mount proper heat shields
- Install carbon monoxide detectors
Customizing Your Barrel Sauna
Last year, I transformed a basic barrel sauna into a luxury spa retreat. The owner nearly cried when she saw the final result. The secret lies in smart customization – let me show you my favorite upgrades.
Adding a Changing Room
The most popular upgrade I recommend is a changing room. A 3-foot extension creates the perfect preparation space. I recently helped a friend build one with cedar walls and hidden storage – now the whole family has space for robes and towels.
When designing changing rooms, focus on practicality:
- Built-in benches with storage beneath
- Cedar hooks for hanging items
- Non-slip flooring for safety
- Proper ventilation to handle moisture
Lighting Makes Magic
After working on dozens of sauna lighting systems, I’ve discovered what creates the perfect ambiance. Indirect LED lights under benches cast a warm glow without harsh glare. Sauna owners particularly love color-changing options that transform their sauna experience.
Smart Storage Solutions
Every barrel sauna needs clever storage. Drawing from Finnish sauna traditions, I’ve helped develop unique solutions that blend function with style. Hidden compartments within benches and heat-resistant cedar shelving are excellent options. Last month, I created a special water bucket stand for my friend that doubled as a towel warmer – his favorite feature.
Maintenance and Care Tips
Your barrel sauna is an investment that deserves proper care and maintenance. I’ve developed a foolproof sauna care routine that keeps them running perfectly.
Simple Daily Care
The secret to a long-lasting sauna? Five minutes of care after each use makes all the difference. I can confidently say that these small habits prevent 90% of common problems. After each session:
- Wipe down benches with a clean, damp cloth
- Prop the door open for 30 minutes to dry
- Check the heater area is clear
- Empty any water containers
Monthly Maintenance Matters
Once a month, spend an hour giving your sauna extra attention. I recently helped restore a 15-year-old barrel sauna that looked brand new, thanks to regular monthly care.
Focus on these key areas:
- Check band tension – they should be firm but not tight
- Clean all wood surfaces with gentle soap
- Test door seals for proper closure
- Inspect heater connections
Seasonal Wood Care
Cedar needs special attention as seasons change. Here’s a simple but effective care routine. Spring and fall, give your wood a gentle cleaning with a soft brush and mild soap. Never use harsh chemicals – they strip the wood’s natural oils. I learned this the hard way when a client used deck cleaner on their sauna. We spent weeks restoring the wood’s natural beauty.
Weather Protection
Different seasons bring different challenges. Here’s how to protect barrel saunas year-round:
- Spring: Check for winter damage and clean any mold growth
- Summer: Ensure proper ventilation and monitor humidity
- Fall: Seal any gaps and prepare for cold weather
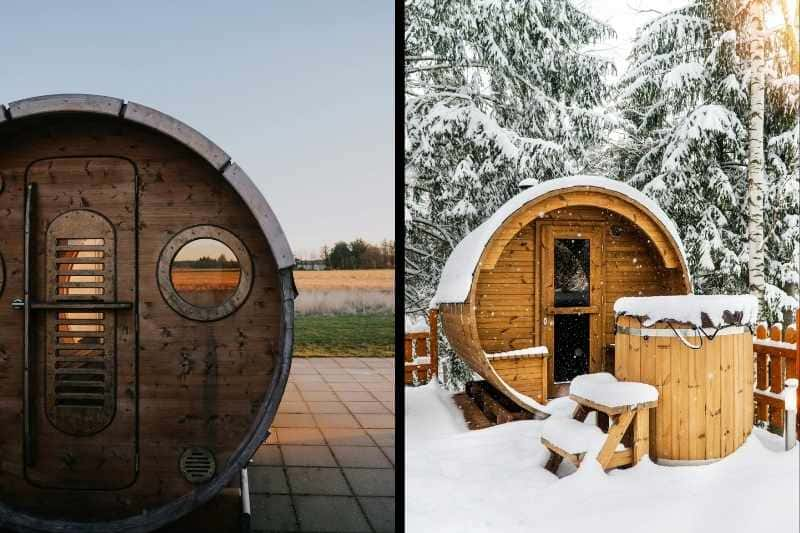
- Winter: Keep snow load manageable and maintain the heating system
Troubleshooting Common Problems
After dealing with hundreds of saunas, I’ve faced every challenge imaginable. Just last winter, I helped a friend in Minnesota keep their barrel sauna running perfectly at -20°F. Let me share the most common issues and their fixes.
Heat Performance: Most heat issues have simple solutions:
- Slow heating: Check door seals and match heater size (6kW for 2-4 person, 8kW for 6-8 person). You can use my sauna heater size calculator.
- Uneven heat: Adjust ventilation flaps (top and bottom) and verify bench heights
- Heat loss: Inspect window seals and door gaps
- Temperature swings: Monitor humidity and heater function
Moisture Management: Water problems can sneak up on you.
- Wet floors: Install proper drainage channels
- Ceiling drips: Maintain airflow balance with both vents
- Damp benches: Keep the door open 30 minutes after use
- External water marks: Check roof seals and band tightness
Wood and Band Issues: Watch out for:
- Small cracks: Normal up to 1/8 inch in cedar
- Warping boards: Check ground moisture levels
- Discoloration: Clean with soft brush and mild soap
- Loose staves: Adjust bands to 30-50 inch-pounds tension
Conclusion
Building a DIY barrel sauna transforms your backyard into a personal wellness retreat. From my years of experience with these Finnish-inspired havens, I can tell you – nothing beats the satisfaction of stepping into a sauna you built yourself.
Your investment of $2,500-$5,000 and a few weekends of work creates a space worth three times that amount. Plus, those 2-3 weekly sessions deliver amazing health benefits.
Take your time, follow the steps carefully, and remember:
- Start with solid foundation planning
- Choose quality materials, especially for wood
- Take extra care with heater installation
- Maintain your sauna regularly
Your DIY barrel sauna journey starts now.

“Become a Sauna Expert Overnight!”
Grab Your “FREE” Sauna E-book NOW!
Get your hands on the ultimate sauna manual. From history to DIY setups, our free guide has it all.

As a Chartered Accountant turned sauna enthusiast, I bring a unique blend of analytical skills and hands-on experience to the world of heat therapy. With over a decade dedicated to researching and testing sauna products and practices, I’ve developed a deep understanding of this field. A the founder of HomeInDepth.com, I provide reliable, easy-to-understand information on all aspects of saunas. My goal is to guide you through every step of your sauna journey, offering meticulously researched, unbiased advice to help you make informed decisions and create your perfect sauna experience. I’m always happy to hear from sauna lovers like you—feel free to leave questions or share your own tips in the comments below so we can learn together. Contact me on:

